

How To Set Up Lighting For Food Photography

Your setup for food photography starts with light. Photography can't happen without it. Photography is painting with light.
Lighting is the virtually important lesson in photography. And so if you feel overwhelmed with all the things you demand to learn, this is crucial. If y'all tin can master information technology, you'll produce cute imagery.
In this photography fundamentals lesson, we will look at the basic setup for food photography, plus introduce a few basic lighting concepts.
This is all you need to go started.
The Basic Light Setup For Food Photography
Firstly, I'd similar to say that I don't particularly like the discussion 'bones' as it implies that zip great will exist accomplished. But that's non always the instance.
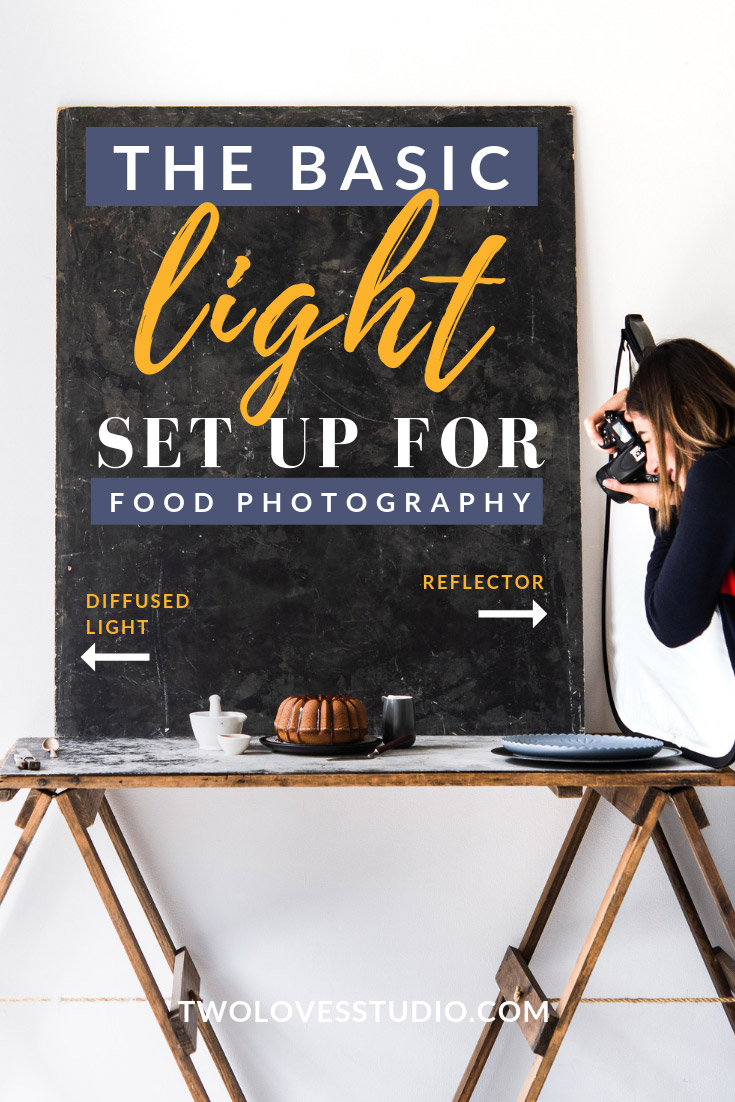
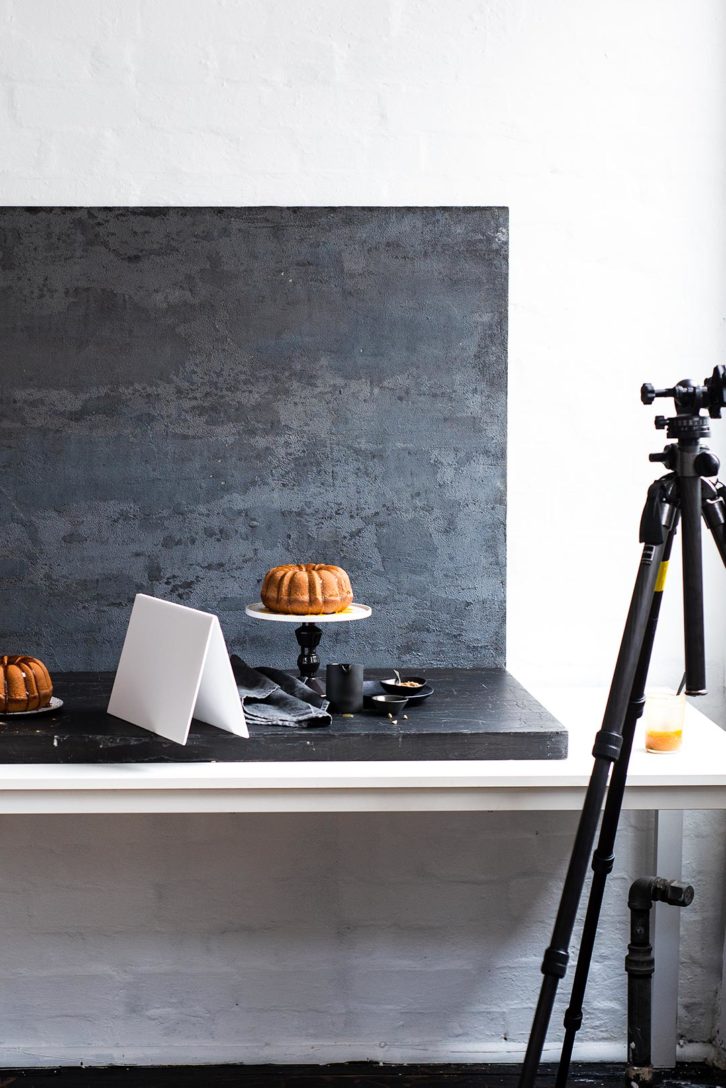
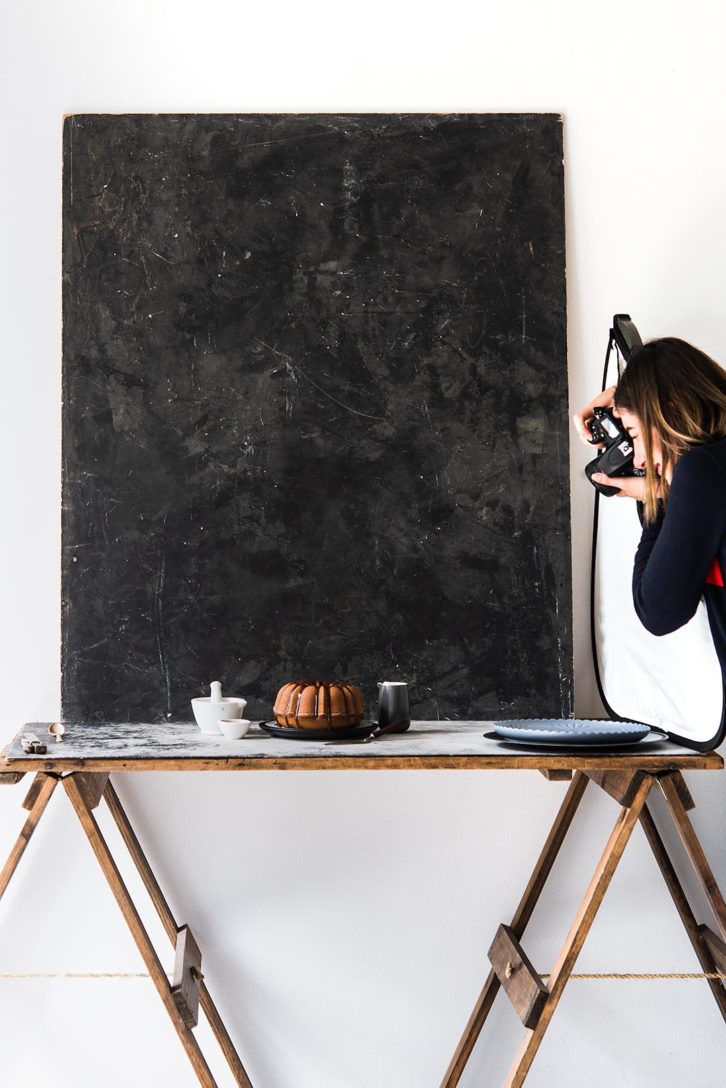
This is a foundational setup from which you showtime to aggrandize your light manipulation skills based on the mood and story you want to tell. The basic setup for food photography to produce the soft light common in our niche is:
- Sidelight – the lite source is side by side to your scene
- Diffuser – a placed between the lite source and your subject
- Reflector – is placed contrary the light source to 'reflect' some light back onto your subject and scene.
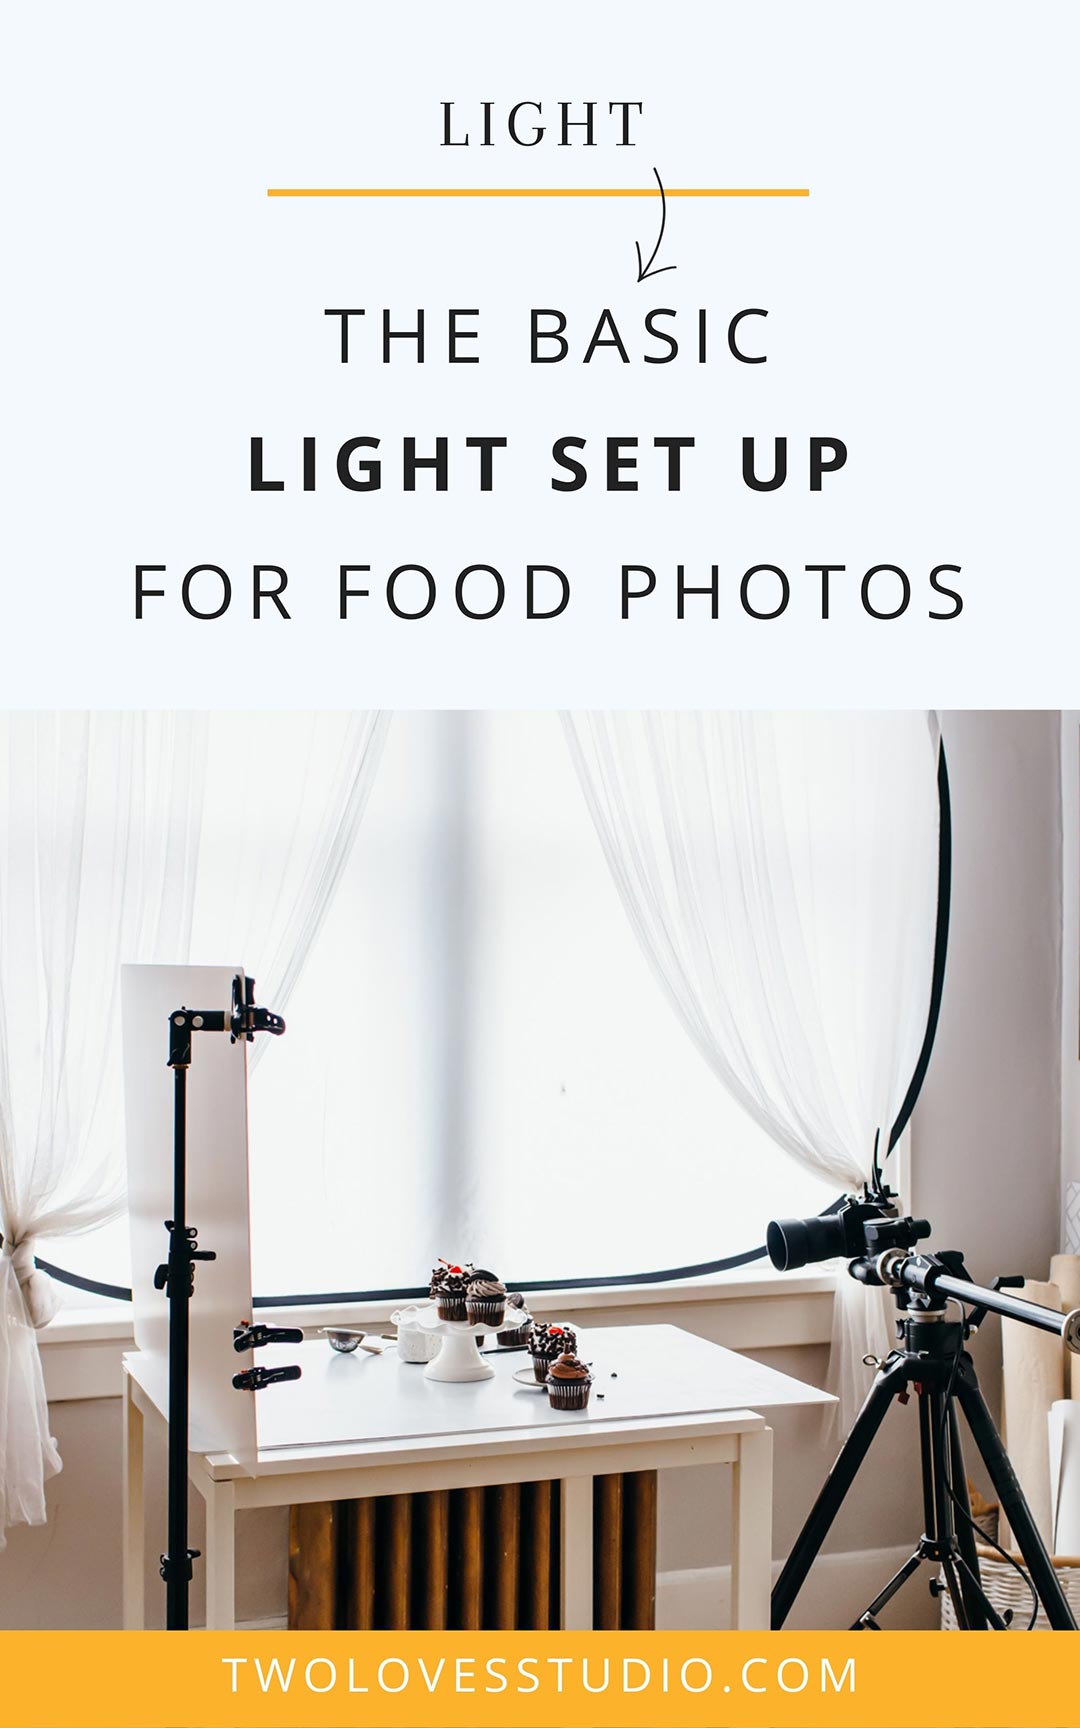
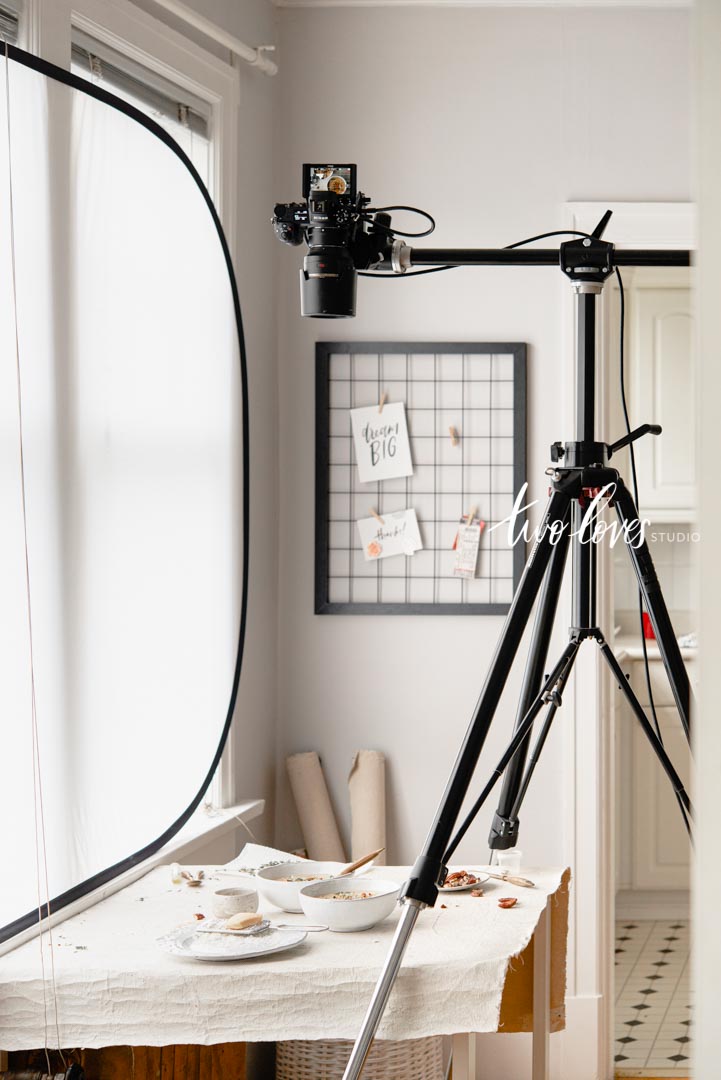
Yous will identify your setup so that it is next to a window, with the light falling onto your setup from either the side. So your subject and the photographic camera are next to the light source.
Next, you'll identify a diffuser between the light source (your window) and your subject. This volition 'diffuse' the low-cal to make it soft – we'll encompass this later. At kickoff, place the diffuser closer to the window than to your subject.
Finally, if yous need to light your subject more evenly, y'all'll place a reflector on the other side of your scene to 'make full' your shadows. This will be your foundational setup. Once you get the hang of this setup for food photography, you tin can then beginning to explore more than light manipulation.
If you lot desire to see more backside the scenes setups for food photography, case studies and how to create beautiful images with natural light so grab my ebook.

Basic Light Modifying Aids
Let's get down to the bare minimum of what we need in order to manipulate natural light, shall we?
The first two light manipulating aids that you should source is, a reflector and a diffuser. You can even get both of these in one and in that location are some cheap combos on Amazon. They await like this. Where possible, it's best to get equally big as you can afford.
A diffuser is something that diffuses or distributes calorie-free more evenly onto your field of study. Diffusers should exist placed betwixt the light source and your subject area – just similar this:

A reflector bounces light from the light source onto the subject. This is what is known every bit fill light. Reflectors typically are placed opposite the light source.
Any reflective surface can be used, from white foam boards to reflective metal or metal surfaces.
Here's what happens in the camera when we use a reflector. The shot on the left is with calorie-free beingness reflected onto our scene. The shot on the correct is without low-cal being reflected onto our scene.
Neither is correct or incorrect, merely dissimilar. Take a moment to experience the difference.
RELATED: How To Manipulate At Habitation
Shop Basic Lighting Gear
For nether $100 yous can get everything you lot demand for a bones lighting gear up-up for food photography.
Every bit a professional, I own all of these diffusers, merely if I were to recommend one, I would go the Neewer 40″ x 60″ as I also use it with artificial light.
For on location and a portable solution, I like the Neewer 24″ with handle.
You can't beat getting white and black foam core to help shape light. I utilize information technology all the time, pairing information technology with these handy cheap clips to stand up them upward.
Most Common Type of Lighting For Food Photography – Soft Light
Now we have the bones setup for nutrient photography and a few modifiers nosotros demand under our chugalug, let'south look at types and direction of light.
The most common type of light prepare for food photography is created to capture soft light. It's used about often considering it'southward complementary to lite food.
It illuminates the texture and details in food while revealing course and dimension.
Soft calorie-free is characterised by soft shadows. Soft light can be used for any mood. You can have bright and soft light or moody and soft light. At present 'soft' is not synonymous with light or nighttime shadows. Soft shadows tin be both calorie-free and dark. What makes them soft is their 'soft edges'.
Can you encounter the difference between the two shadows above? The shadows in the image on the right are 'soft' (produced by soft light) and the shadows on the right are 'hard' (produced by hard light).
Now that we know the most common blazon of low-cal used in food photography, permit's look at the two main directions of light.
The 2 Main Directions of Light: Back and Side Light
The 2 primary directions of light used in food photography are side light and backlight.
They are pretty cocky-explanatory, but let'due south embrace them chop-chop anyway. Side light is where light comes from the side of the subject and your camera. Backlight is where the light is coming from behind the subject area and opposite your camera.
Sidelight works actually well for nearly all setups for food photography. W
hich is why information technology's a become-to for many food photographers and a great place to beginning.
Let's come across those visually.
Why is this important? Take a moment to encounter how the lite shapes the subjects in the images differently.
RELATED: 8 Tips For Embracing Low Light Food Photography.
Fourth dimension of Twenty-four hours Affects Calorie-free
You'll generally know from just beingness alive that the time of day as well affects light. From sunrise, to midday, to sunset and twilight. The low-cal is of different intensity, dissimilar management and has a different feel.
Gosh, even the seasons bring almost such different light correct?
If yous're shooting natural light, it's important to know the departure.
This is why there is a common exercise you've probably read involving photographing a bowl of fruit at dissimilar times and unlike places in your firm.
It's a very powerful practice and it works.
If you think about your habitation, call up nigh how light changes in dissimilar rooms. Are at that place rooms that accept bright light at a certain fourth dimension of 24-hour interval and others that are dark?
One of the simplest and most powerful things yous tin practice is sympathise how the calorie-free changes in your shooting space. And then why not check every 60 minutes to see how the light looks and notation down the differences throughout the day.
The Recap
In a nutshell, here are the takeaways from this post:
- The foundational light gear up for food photography involves placing your set up upwards next to a window, with a diffuser in betwixt your low-cal source and the subject. Placing a reflector opposite the low-cal source.
- Yous'll want to take a diffuser and a reflector as staple lite manipulation aids.
- The virtually mutual type of light for food photography is soft lite.
- To two directions of lite to craft are side light and backlight.
- Fourth dimension of day will produce different kinds of natural low-cal.
- Watching natural low-cal change throughout the day and from day to day, season to season volition help you see the diversity.
Lesson Activity
For this activity, yous won't utilize a photographic camera. I don't want you to exist worried about your settings or what yous'll be shooting.
I but want you to 'feel' and 'see' the light.
The next time you have a full day at home, I want you to:
- Set an alarm on your phone for each hour on the dot.
- Each time the alert goes off, walk into each room in your firm that has a window. Even the garage or shed!
- Wait at the light. Feel the light. Ask yourself these questions
How strong is the light?
Are in that location any shadows you tin see?
Is the light coming through the window?
What direction is the window facing?
What time of day is information technology, morning, midday, afternoon, evening?
Does the lite have a colour to it?
How does the light make yous feel?
Doing this two days in a row will be especially helpful and allow you to meet that low-cal changes with weather and season.
If y'all're taking Photography Fundamentals 101, click here for your next lesson.
Ii Loves Studio wasnot paid to write this mail service, notwithstanding itdoes contain chapter links. If y'all purchase an item from an chapter link, Two Loves Studio does get a commission on the sale which goes towards continuing to provide crawly content. Only affiliates for products/services I believe in and that marshal with my values announced on this site.
Source: https://twolovesstudio.com/blog/basic-light-setup-food-photography/
0 Response to "How To Set Up Lighting For Food Photography"
Post a Comment